
M5Stack and M5Stick Devices⌁
Using a modified version of Martin Lukasek's M5Stack_NightscoutMon You can connect ESP32 displays directly to your phone trough Bluetooth to display your readings.
Binaries are directly available for M5Stack Core and M5Stick C device. If you wish to use different devices like M5Stack Core 2 you'll need to compile the code with Arduino.
Two guides are provided below, using a Windows computer is usually easier. Mac instructions are here.
Installing with a Windows-based Computer⌁
This guide explains step by step how to program your M5Stack with the M5Burner utility (Arduino not required).
Install the M5Stack USB Driver⌁
If your computer runs Windows 10⌁
- Go here: https://docs.m5stack.com/#/en/arduino/arduino_development and download the driver.
If you’re running an older version of Windows⌁
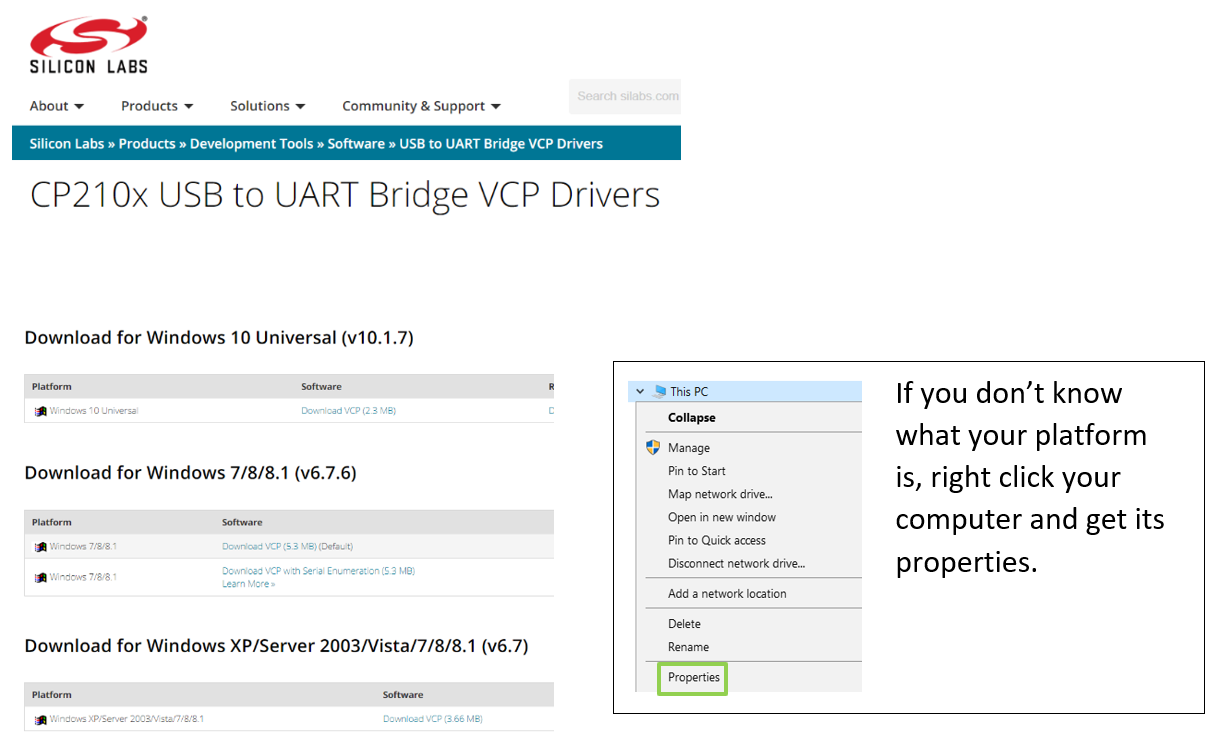
- Go to of SiLabs https://www.silabs.com/products/development-tools/software/usb-to-uart-bridge-vcp-drivers and choose the version matching your operating system.
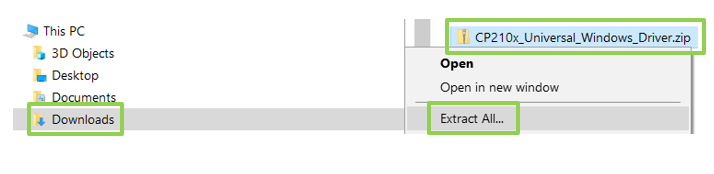
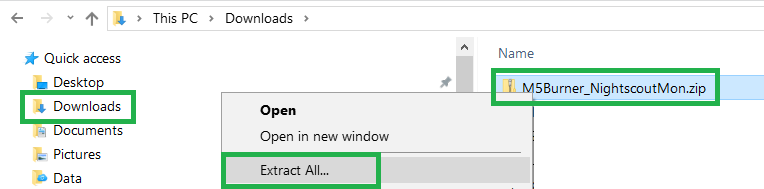
In the Downloads folder, extract the .zip file
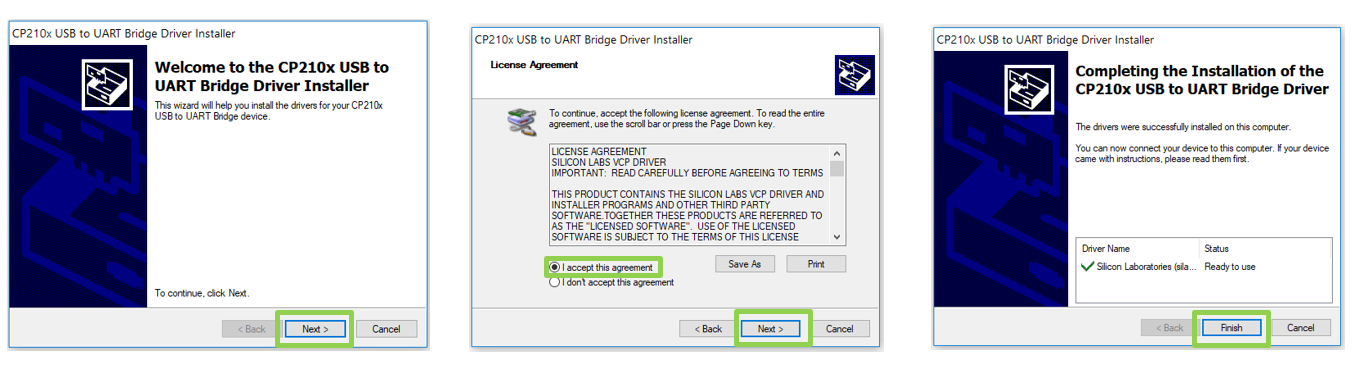
Open the extracted folder and run the installer for the correct platform type of the driver.
Next, Accept, Next, Finish.
Connect your M5Stack device and wait a moment to make sure your computer recognized it.
NB: If you have previous versions of SiLabs drivers you might need to remove them in order to see the M5Stack serial port.
Download the Latest Release⌁
M5Stack: Open this link in a new tab https://github.com/JohanDegraeve/M5_NightscoutMon/releases
M5StickC: Open this link in a new tab https://github.com/JohanDegraeve/M5_StickC_xdrip_iOS/releases
Note: take the latest release for your device and not the one from the example below

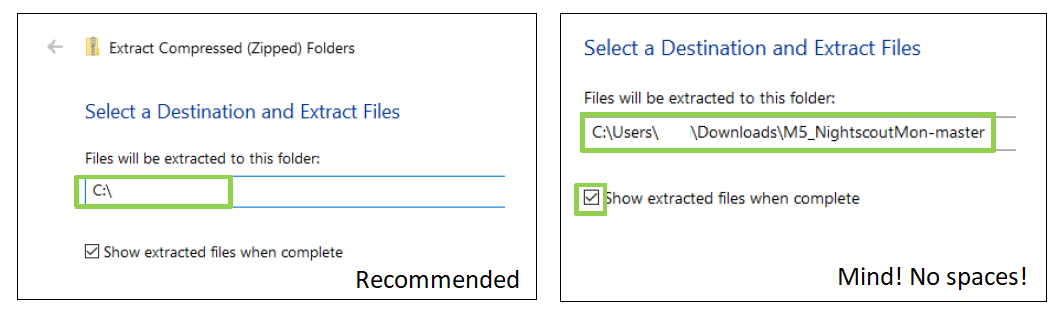
From the Downloads folder, extract the .zip file to C:\
You can extract it wherever you want, but avoid a path name with spaces inside.
Click Extract
Program the M5Stack⌁
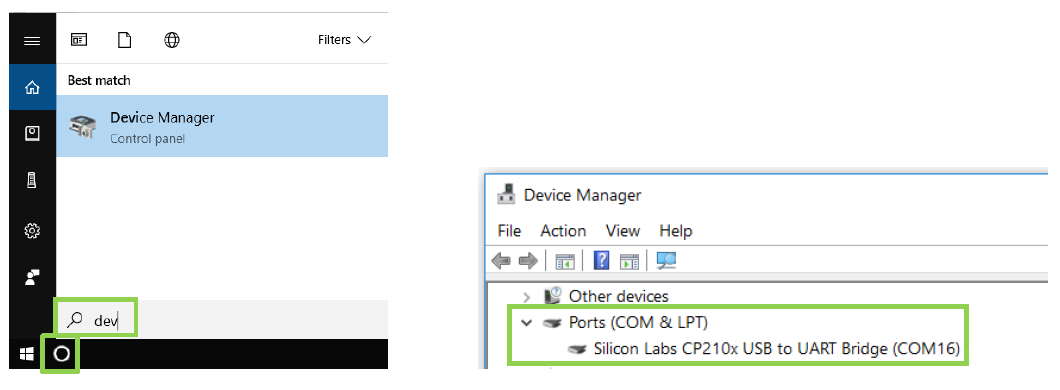
Open the device manager and check:
- M5Stack is available
- Which COM port it uses
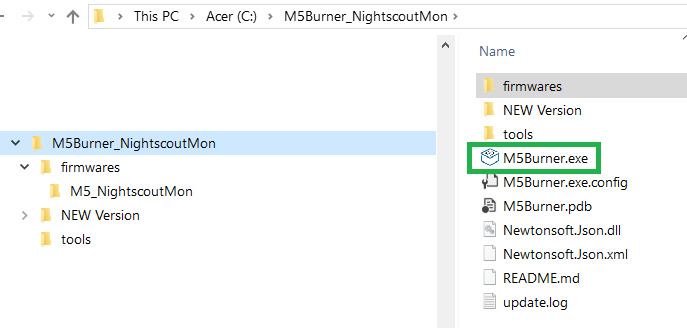
From the folder C:\M5Burner_NightscoutMon (or the other folder you selected when extracting the .zip file) run the program M5Burner.exe
If your computer uses Windows Defender you will need to authorize it to run.
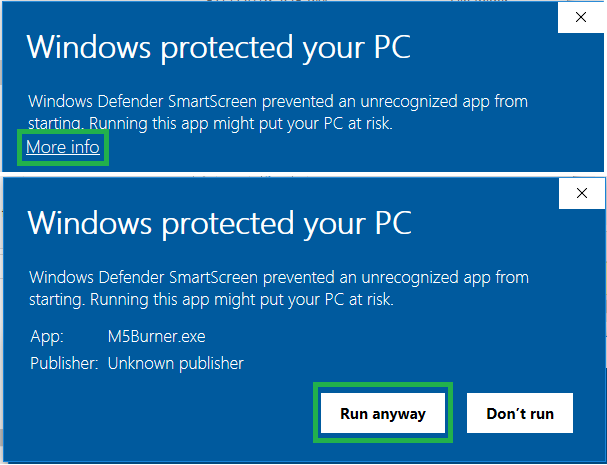
This program was provided directly from M5Stack (Shenzhen Mingzhan Information Technology Co., Ltd.) with authorization to redistribute. We consider it as safe to run.
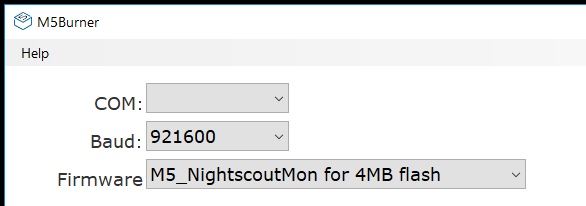
The application opens, select your COM port, make baudrate 921600 and select the M5_NightscoutMon firmware.
Note: I removed the COM number to avoid confusion since it might be different.
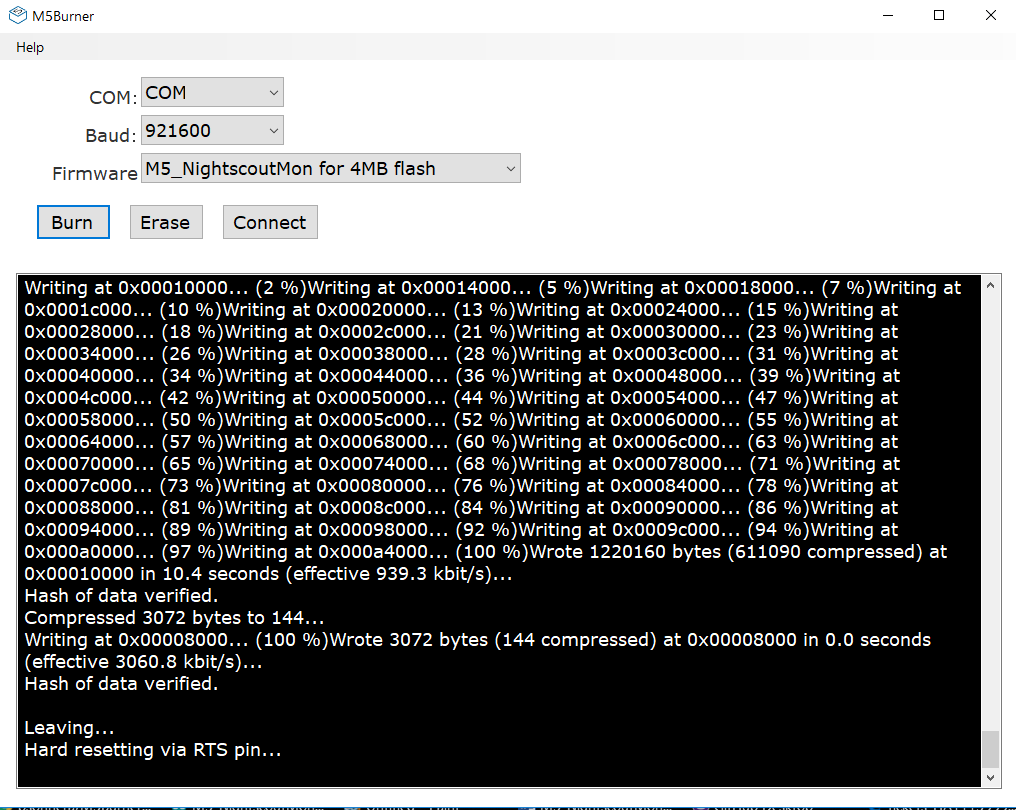
Click Burn
Installing with a MacOS-based computer⌁
This guide explains step by step how to program your M5Stack with the ESPTool utility (Arduino not required).
Install the M5Stack USB Driver⌁
If your computer runs a recent MacOS version⌁
- Go here: https://docs.m5stack.com/#/en/arduino/arduino_development and download the driver.
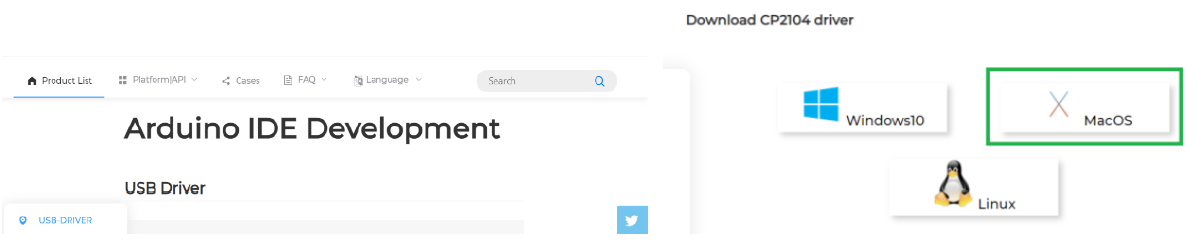
If you’re running an older MacOS version⌁
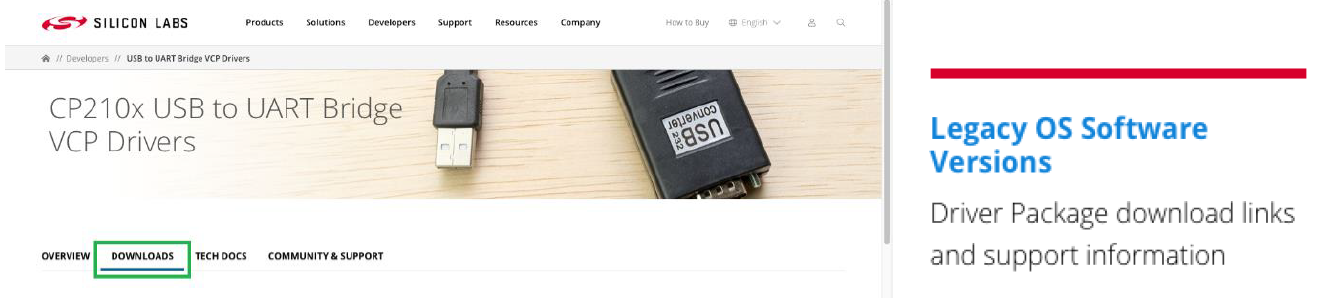
- Go to of SiLabs https://www.silabs.com/products/development-tools/software/usb-to-uart-bridge-vcp-drivers and choose the version matching your operating system.
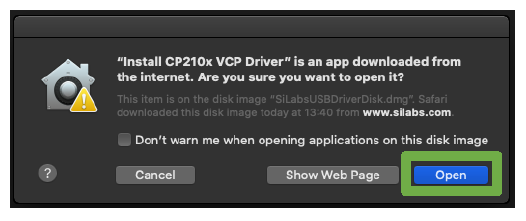
Allow download and open finder to Downloads, folder Mac_OSX_VCP_Driver, double click the SiLabsUSBDriverDisk.dmg. The disk will extract on your desktop. Open it and run the installer.

Select Open
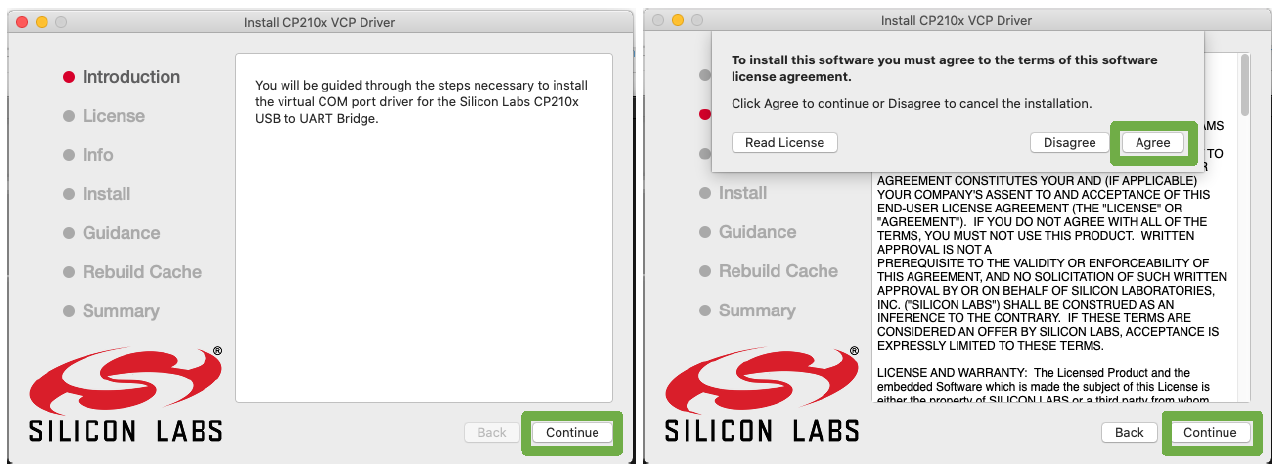
Click Continue, Continue, Agree to license…
Continue, enter your password, Continue, Open Security Preferences
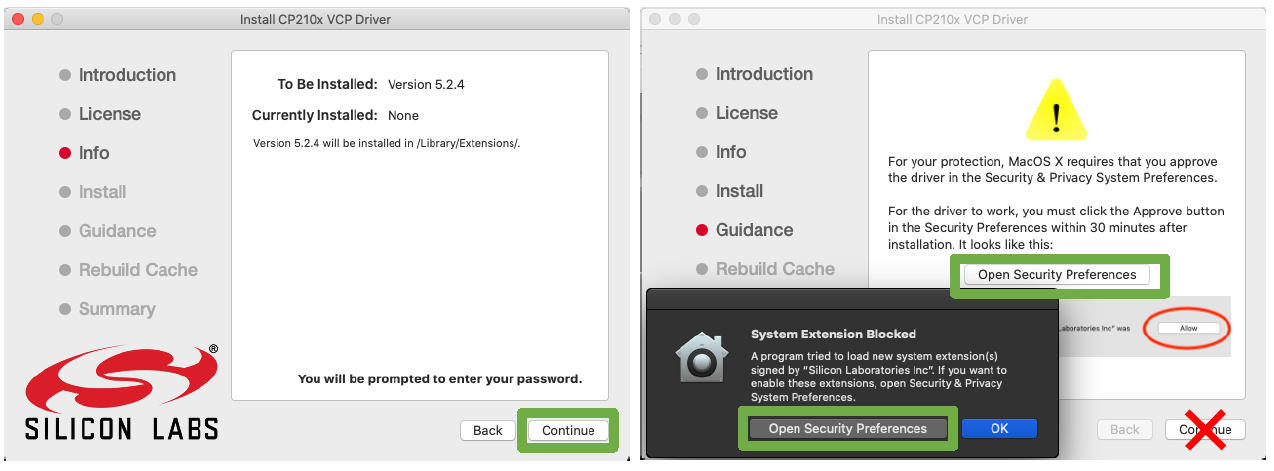
Unlock the panel (enter your password) and allow the driver, close Security & Privacy

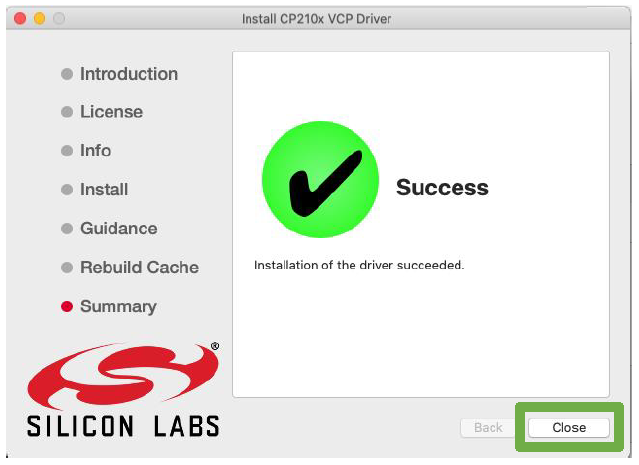
Wait until the install completes and close.
Connect the M5Stack device to your computer.
Install the ESPTool⌁
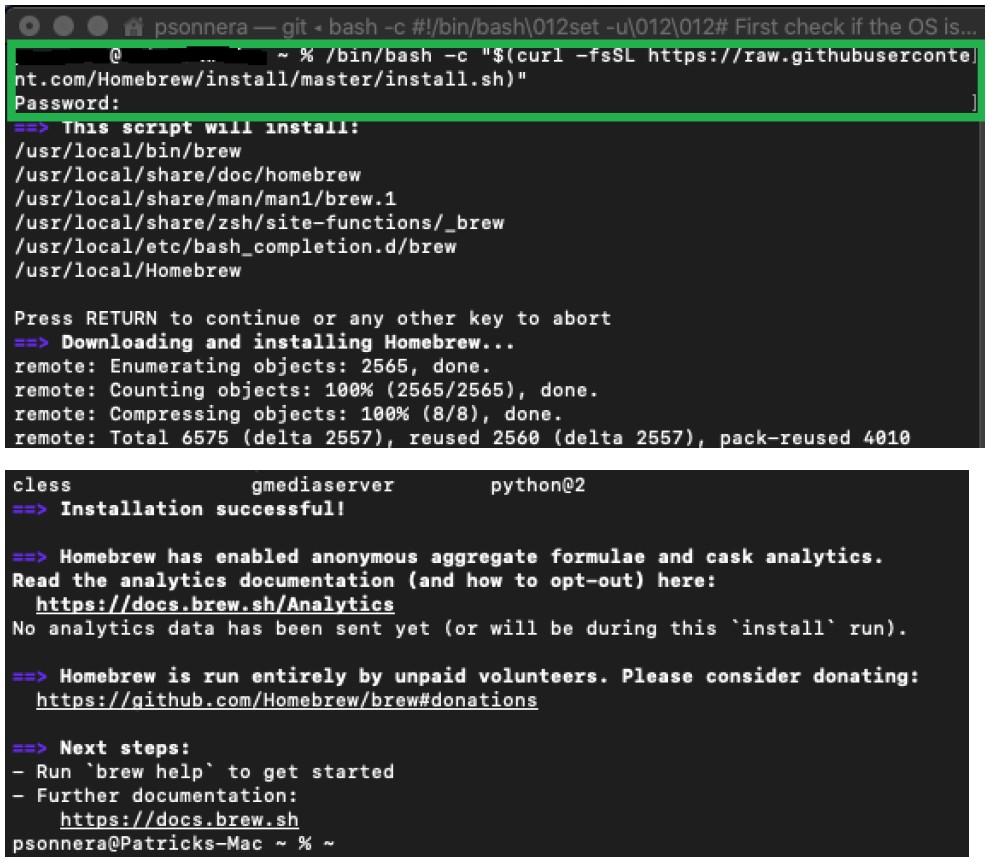
Install Homebrew⌁
Open a terminal, copy and paste:
/bin/bash -c "$(curl -fsSL https://raw.githubusercontent.com/Homebrew/install/master/install.sh)"
Enter your password when required, press RETURN to continue. It will take some time, be patient.
Then enter:
brew install esptool
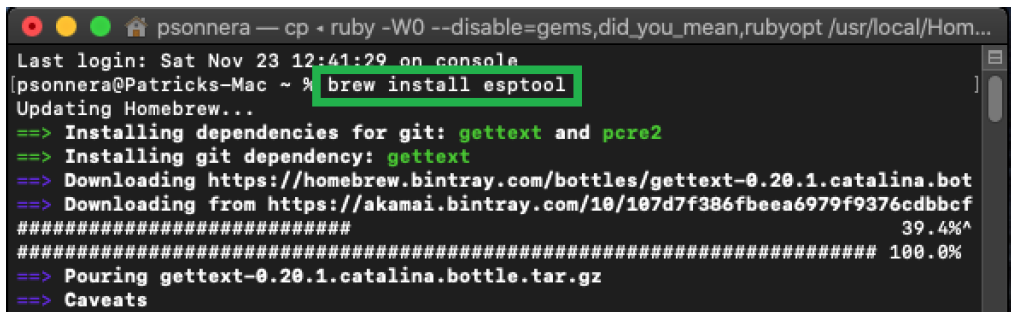
Wait until the command completes.

Connect your M5Stack to an USB plug of your Mac and enter:
esptool.py flash_id
If your device is recognized correctly you will get the path of the serial port:
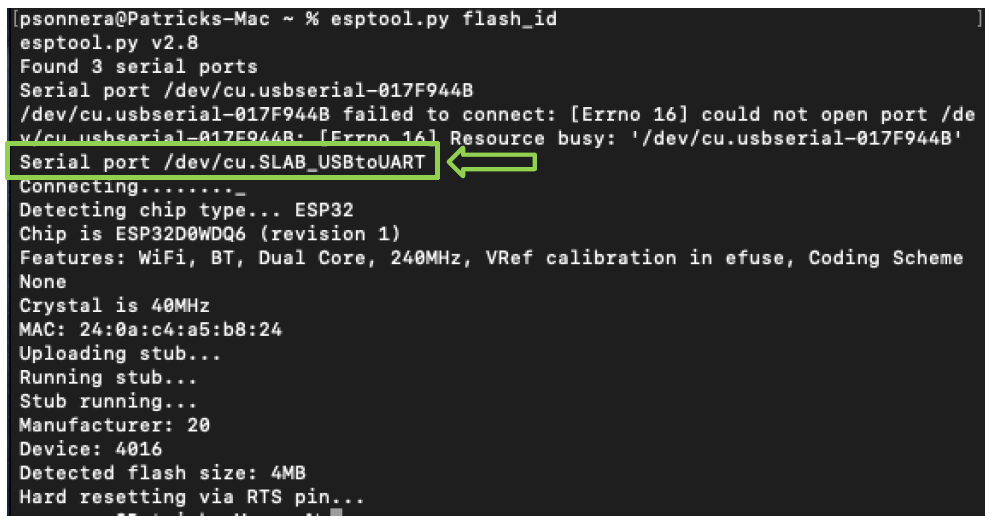
Take note of the port, in this case it is /dev/cu.SLAB_USBtoUART (yours might be different)
Download the Latest Release⌁
M5Stack: Open this link in a new tab https://github.com/JohanDegraeve/M5_NightscoutMon/releases
M5Stick: Open this link in a new tab https://github.com/JohanDegraeve/M5_StickC_xdrip_iOS/releases
Note: take the latest release for your device and not the one from the example below
Allow downloads on "github.com" if required.
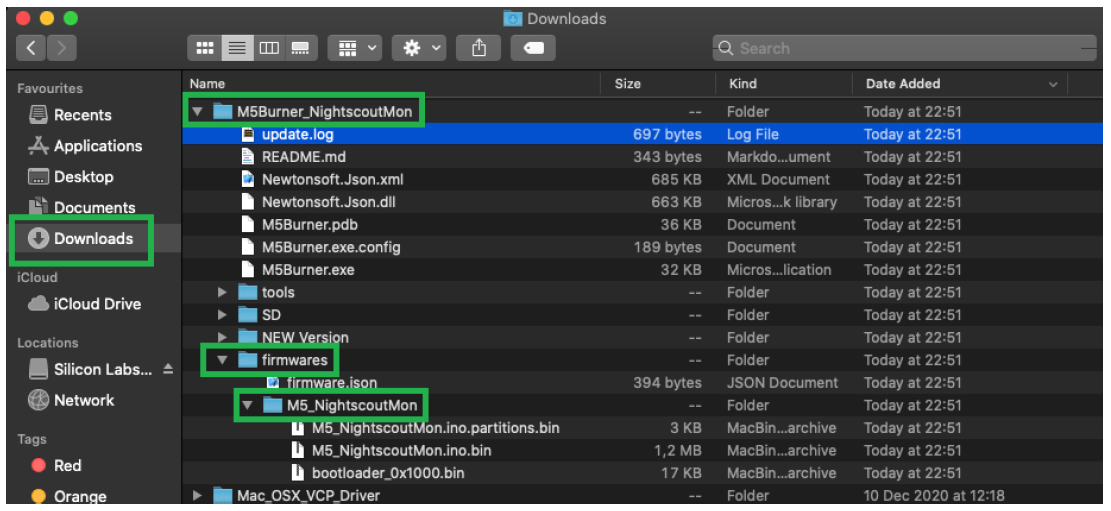
Once completed open your Download folder and navigate to M5_NightscoutMon below firmwares, inside M5Burner_NightscoutMon
Program the M5Stack⌁
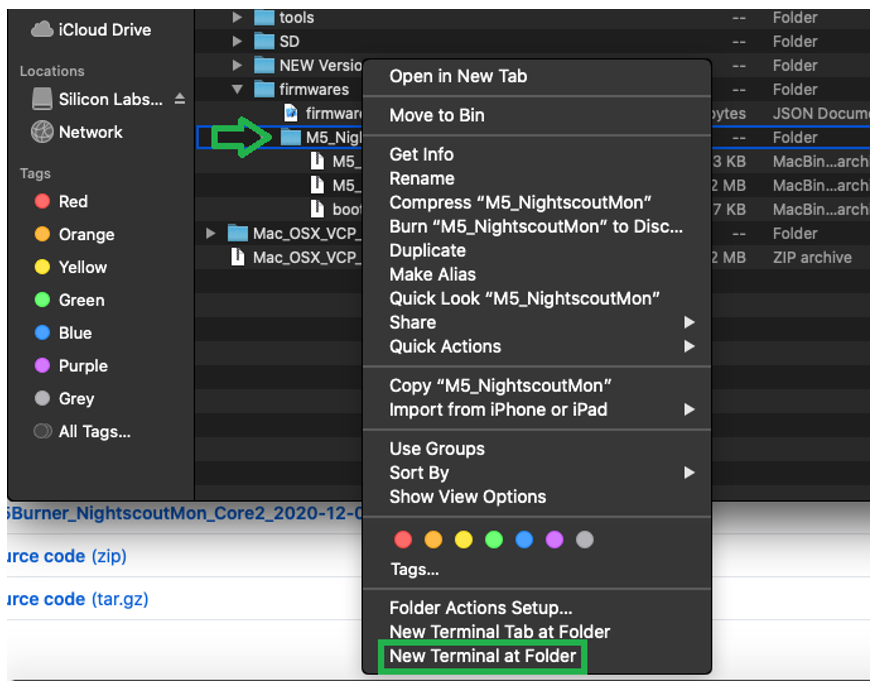
Right click on the folder and select New terminal at folder. A new terminal will open.
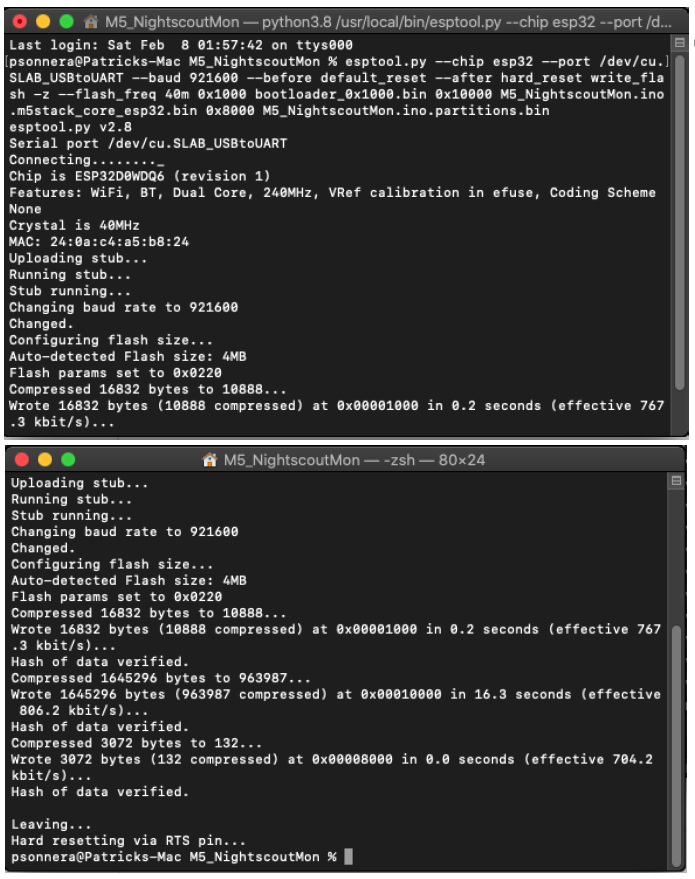
Copy and paste the following command verifying the port is identical to the one you noted before:
esptool.py --chip esp32 --port /dev/cu.SLAB_USBtoUART --baud 921600 --before default_reset --after hard_reset write_flash -z --flash_freq 40m 0x1000 bootloader_0x1000.bin 0x10000 M5_NightscoutMon.ino.bin 0x8000 M5_NightscoutMon.ino.partitions.bin
Wait until the command completes
Connect to xDrip4iOS⌁
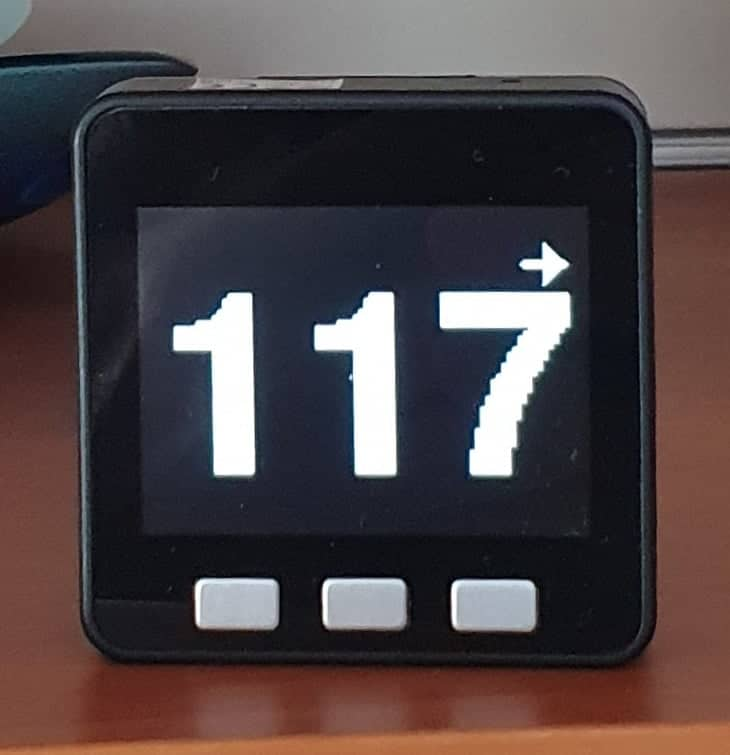
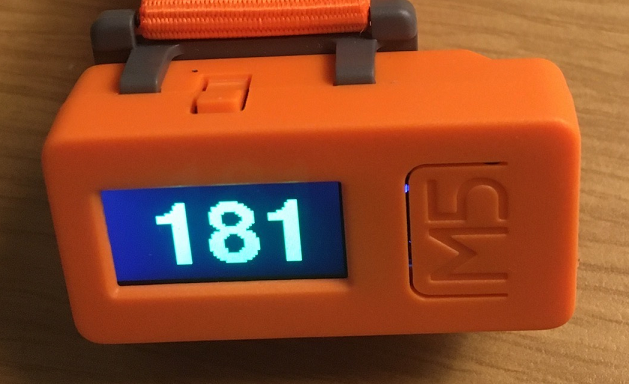
Your M5Stack should boot up like this and wait for connection from xDrip4iOS.
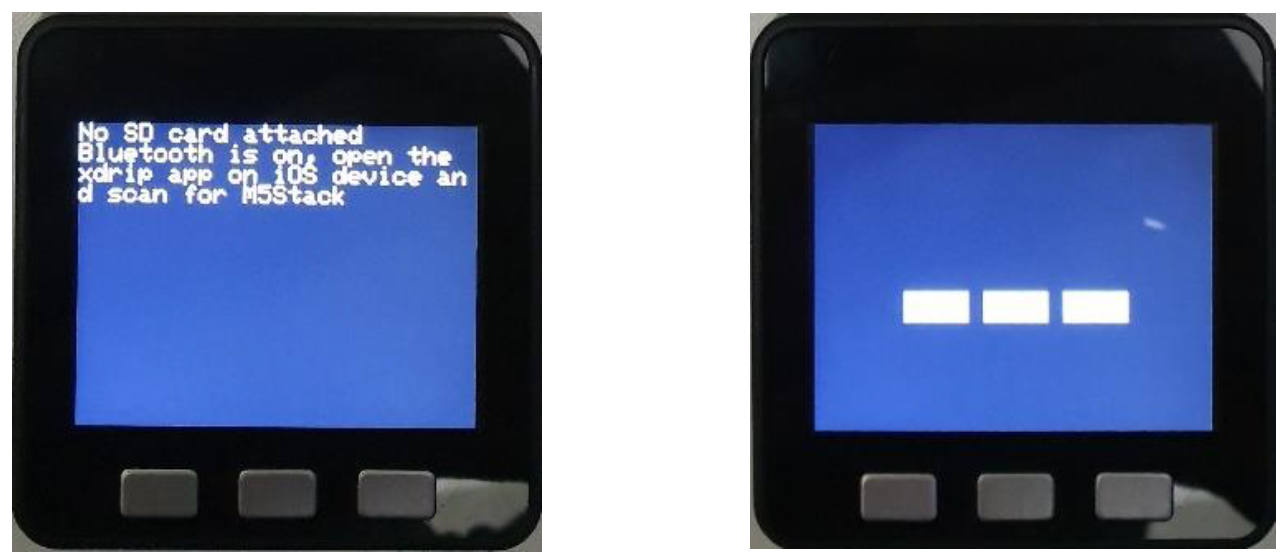
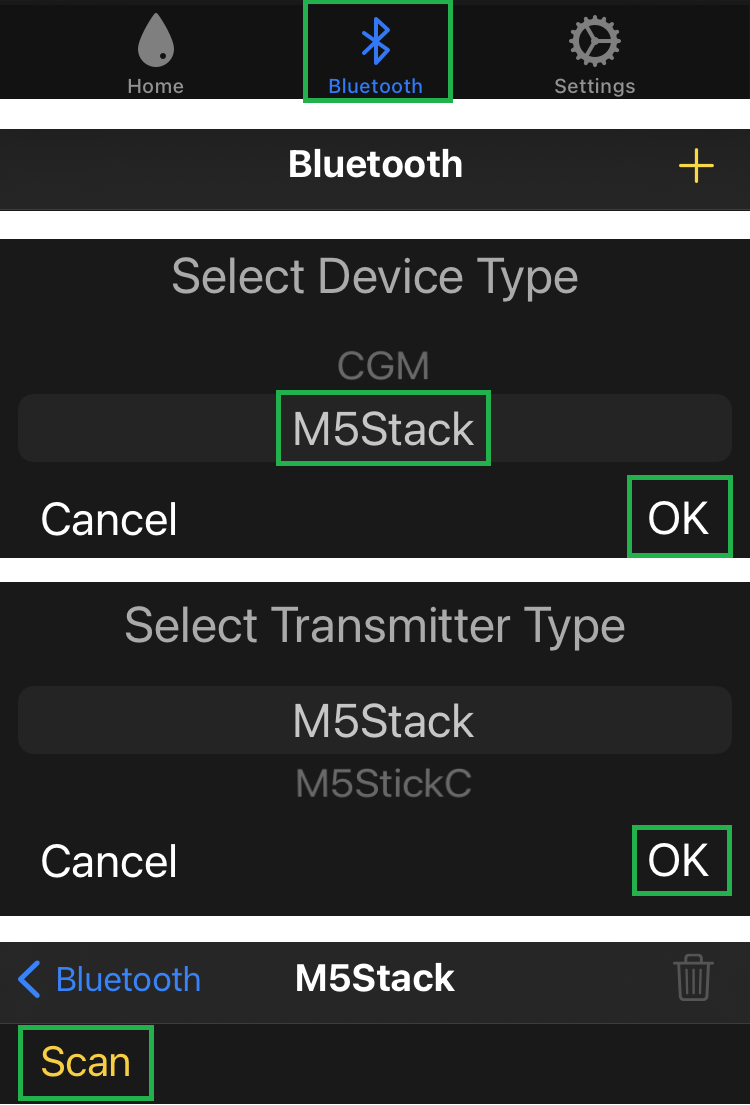
Open xDrip4iOS Bluetooth and add a new device.
Select M5Stack then your device type and finally Scan.
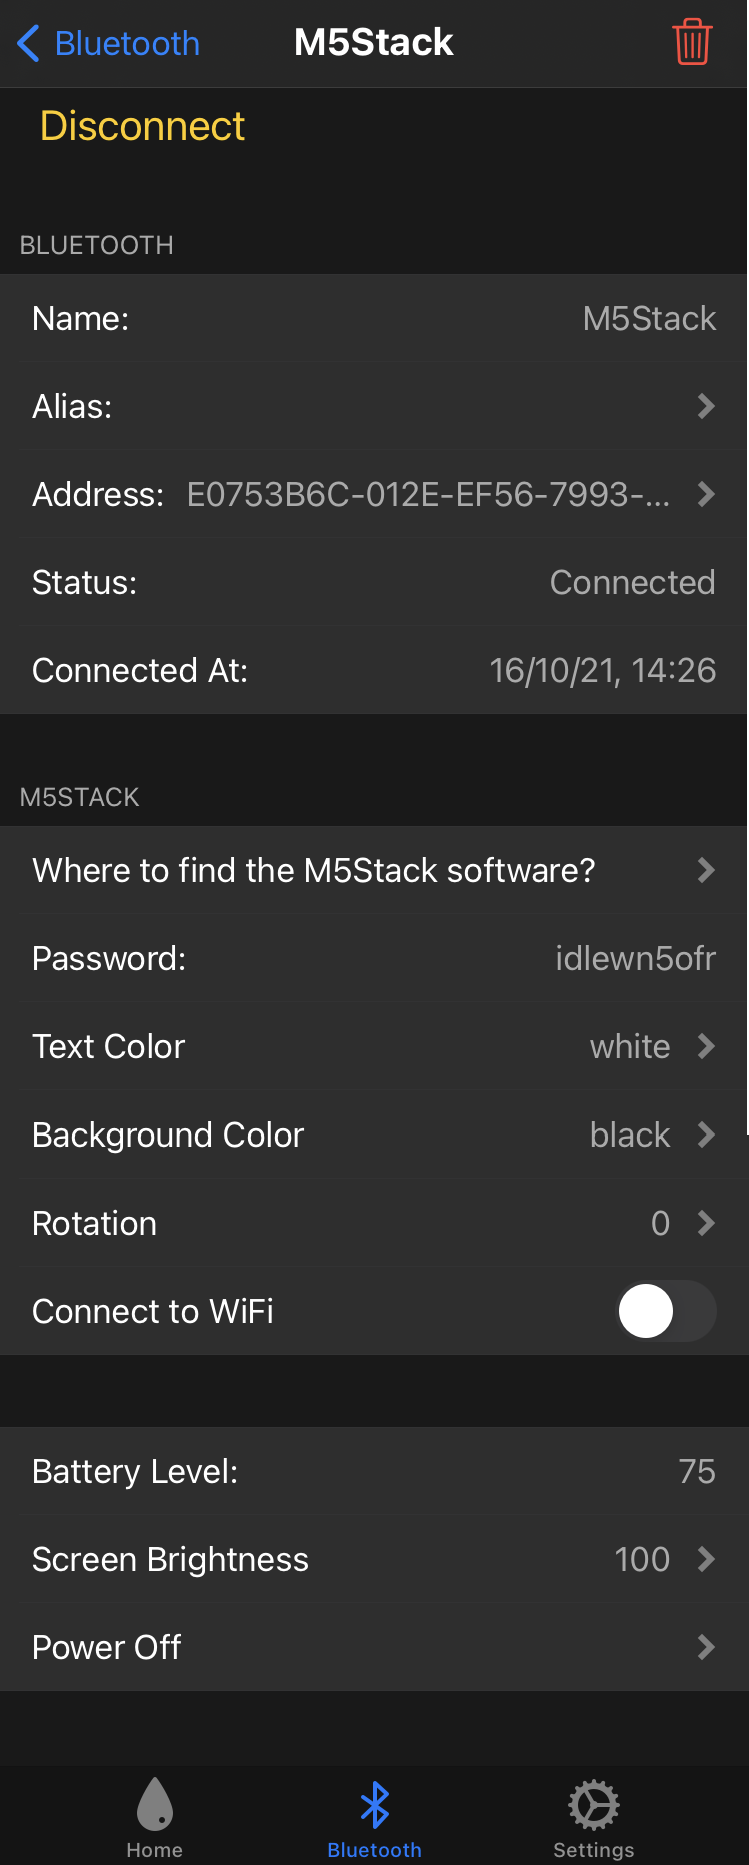
Note: If your device was already connected follow the instructions to reset the password (disconnect, reset and connect).
Your device will display the glucose value from xDrip4iOS when xDrip4iOS displays a value, and when within Bluetooth range.
You can modify some settings like colors, screen rotation, and eventually turn of the monitor.
More features documented in the project repositories
https://github.com/JohanDegraeve/M5_NightscoutMon#readme
and